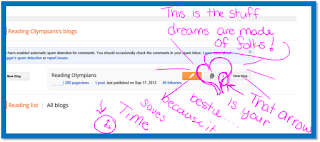
Hi everyone! My name is Michelle (The 3AM Teacher) and I have been hard at work getting Reading Olympians online. I was just about finished with their blog, when I decided that I wanted their "surprise signature" graphic to show up at the bottom of each of their posts. This is not a difficult task - that is, unless you are me and you have OCD...hahaha
To add a signature at the bottom of each post, most bloggers choose the easy way out. However, the easy way also requires a bit of manuevering each time you open to write a new post. For me, this is a pain, but manageable. For the Reading-O gals, this may cause some major confusion and frustration - and I certianly do not want that to happen.
Let me show you what I mean....
Here is the most basic directions I can give anyone who wants to have that cute signature image in each post (without having to add an image everytime you post).
Step One: Make sure that you have the image you want to use ready (It should be an image you love, because it will be in every post).
The image must be uploaded to Photobucket (or a similar online photo storage place) in order to get that individual image URL
Now that you have a be-e-A-U-tiful signature awaiting to be shown to the world, you are ready to begin the easiest tutorial yet!!
Step #2
Login to Blogger, click on SETTINGS from the cool new drop-down menu thingy...

Look at this image below to see the drop down menu that I am talking about...
Step #3 ( We are Movin' & u' Groovin')
Once in SETTINGS, click on the POSTS & COMMENTS tab to the left...

Now, open up a word Doc, One Note, notepad...whatever you got that you can create your code in to save....
Step #4
Grab the image code below and make sure to get ALL of it - do not even miss a quotation or else your image will not show up correctly - or at all!!
Once you have placed your image url into the code, you will refer back up to the previous photo & you will get to touch this time..hahaha.
Step #5
Copy your code & paste the code into the POST TEMPLATE box. If your box is not automatically exmapnded, just click on the POST TEMPLATE (I believe it is text) and it will expand for you.
Step #6
SAVE your changes!!
Now, open a new post to write and you will immediately see your image there... NOW, you will see why this bothers me...if not, then enjoy the easy life!! hahaha If you are more like me, then you will go crazy having to spend even TWO extra seconds having to click enter on your keyboard until your image is below your post and out of your way... This hassle, my dear friends, is not what I was going to stand for...
Instead, I got out my HANDY DANDY HTML/XHTML/CSS Bible and searched to find where I needed to add the image code in the HTML template of the blog, so that the image did not show up in my post while I typed - but magically appeared in just the right spot - AFTER I clicked PUBLISH.
I will tell you that I wrote the code and Krista and Julie will enjoy the luxuries that are porduced by my OCD..LOL. They will never get to experience the frustation of clicking ENTER on their keyboard or having to position their signature...it is already there - nestled all snuggly in it's code...hahaha
If you would like to know how I did it...just make sure to stop by my blog tomorrow afternoon (later-ish) and grab the tutorial...while your visiting, you will also get an update on Frosty's schedule!! I think he might have had enough people sign up to travelt o ALL 50 states!! Can you believe it??
If you haven't signed up, but you want to - click HERE to sign up to have Frosty visit YOUR classroom!! (for lower AND UPPER GRADES). Hmmmm...I wonder if Krista and Julie ahve signed up yet?? Hahaha!!
IMPORTANT: Before I leave, I would like to give you a little more code for those who need to re-size your signature image WITHOUT having to open up an editing program...no need for that...
Right after the parenthesis of your image link use the following text to adjust your width and height.
width="125" height="125" (you can adjust the pixel sizes to fit your needs)
Your code will look like...
<img src= "YOUR IMAGE URL" width="125" height="125"
You will finish the remainder of the code from above. MAKE sure that you do not remove the parenthesis or that you do NOT add spaces between the "=" signs.
Well, I have to say that if you are anything like me, then you will fall head over heals in love with Krista and Julie and their Reading Olympians program. Over the next week, they will be adding a great deal of information about their program including; links, overviews, samples, and even a new store right from the comfort of their blog!! I hope you take the time to look over this program and a chance to connect with these two brilliant minds!! I have thoroughly enjoyed working with them & I have many more Greek graphics coming!!
Thank you for your support and stopping by to read my ramblings...hahaha..
Here is a special gift for those who came to visit the very first blog post on Reading Olympians (that I hoarded...hahaha).. Enjoy...this bright map I created!! It is to celebrate Frosty...and it's FREE!!
You can read my Terms of Use HERE if you have questions about how my graphics can be used.
Have a great week & don't forget to stop by my blog to grab the tutorial tomorrow..
A special thanks to Krista & Julie - You two have been amazing & I love that I can watch and be a part of your journey!!!


I love this tutorial! It's exactly what I have been looking for! I love your blog designs and hope that your friends don't mind you using their space! Krista and Julie, you are a lucky bunch!
ReplyDeletePatty
2ndinline.blogspot.com
Thank you Patty!! I am so glad this was helpful!!
ReplyDeleteMichelle
Thanks Michelle. I had no idea how to do it until your tutorial. You are amazing!!!
ReplyDeleteArlene
LMN Tree
Thank Arlene...I learned by reading through other tutorials..hahaha...just paying the knowledge forward..(-;
ReplyDeleteMichelle
The 3AM Teacher
Visit My Blog
Email The 3AM Teacher
Visit My FB Page
Hijacked by a very competent artist, blogger, designer....is a great way to start a blog!
ReplyDeleteLaurie
Chickadee Jubilee